Published 12/21/17 by Chris Hutchins
Living in San Francisco, it’s hard not to find yourself in a regular discussion about the latest startups or living a healthy lifestyle. So when a Peloton launched a in-home cycling experience similar to SoulCycle, it seemed to come up in quite a few conversations. Then I saw it show up on HuffPo as the top 2017 holiday gift.
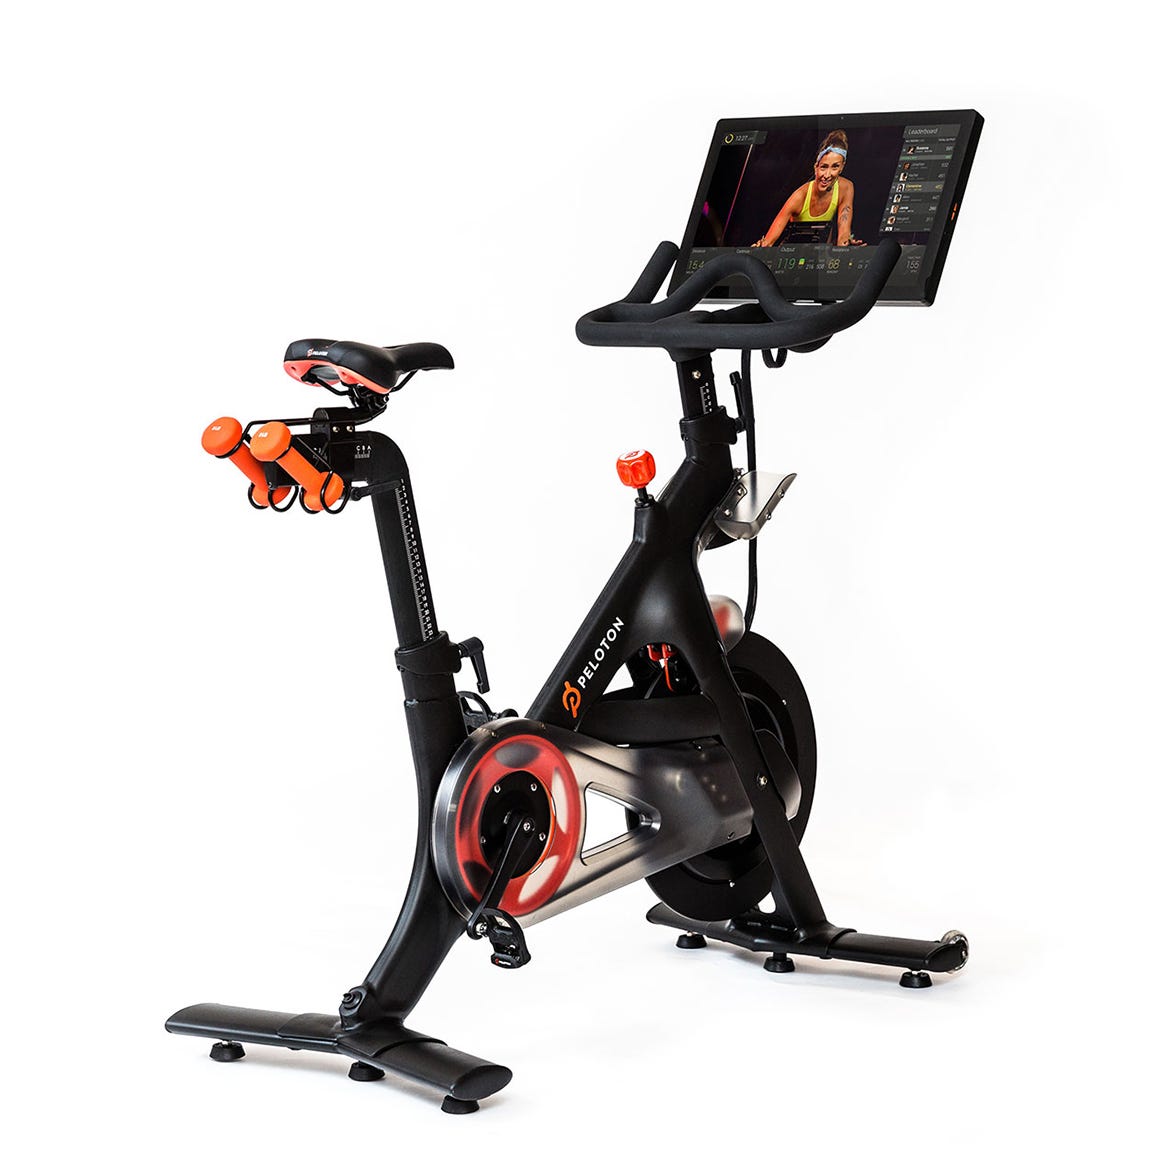
Now, I don’t even own a bicycle, but since starting Grove, I’ve found myself with less and less time to get to the gym. So when a few friends mentioned how much they loved their Peloton, it piqued my interest. Between its beautiful design, my wife’s love of spin classes and the prospect of more frequent exercise, I immediately decided I wanted to one…
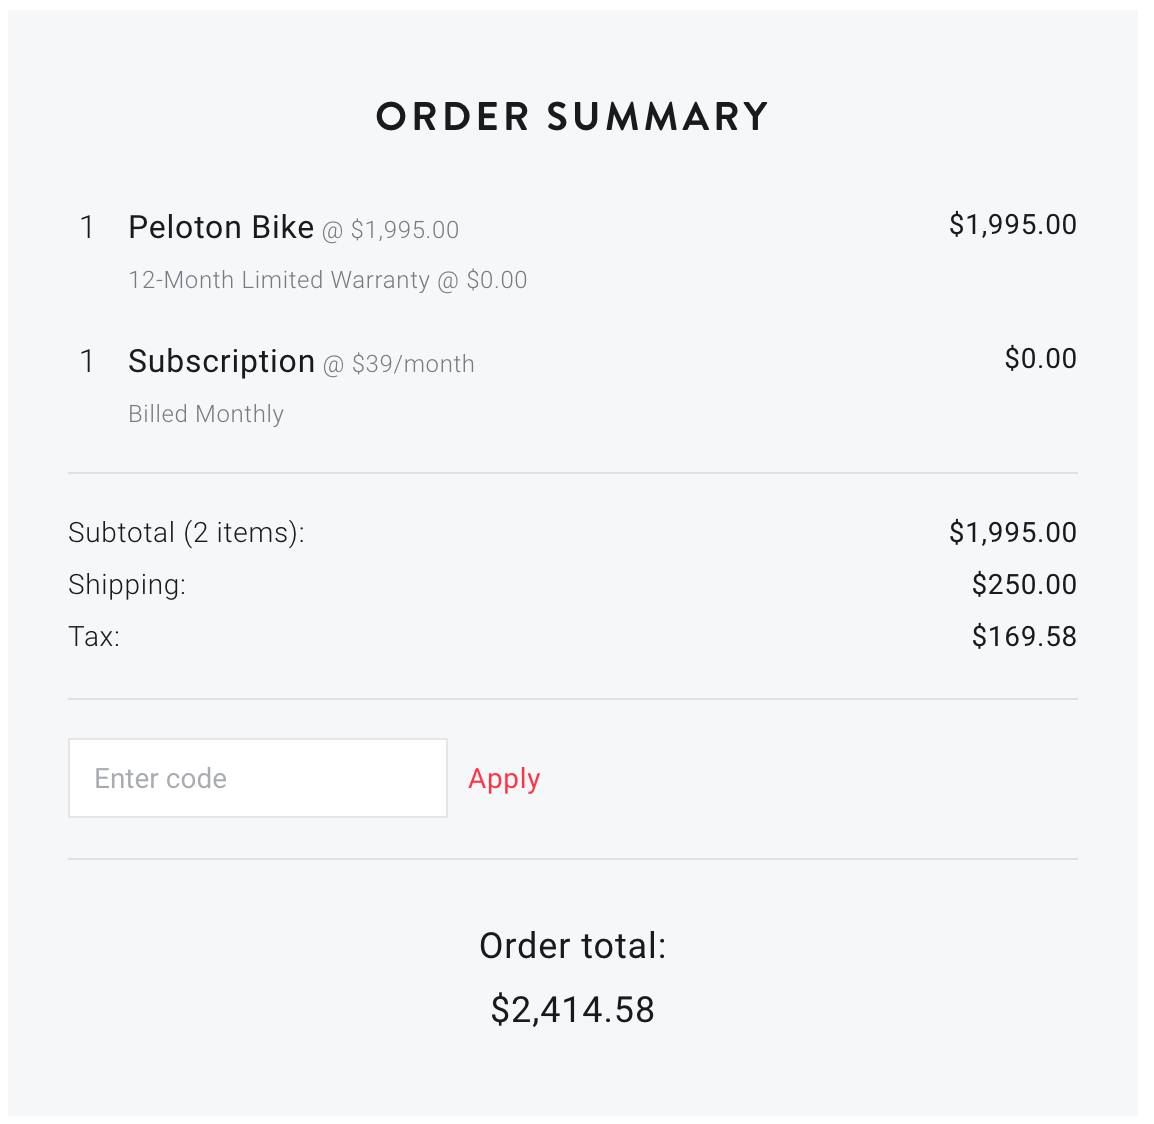
Then I saw how much it cost:
There MUST be another way
If you know me, you know that at that price, a Peloton was off the table. But I’d convinced myself that I needed it, so it was time to optimize. After learning that Peloton had an app with access to all their live and on-demand content, I quickly found a group of 1,000+ people on Facebook doing what I wanted to do. It was time to build a DIY Peloton.
The plan was to find a belt driven (much quieter) indoor bike that I could pair with a bluetooth cadence sensor (an important metric used in all thePeloton classes). For streaming classes, I was going to put an iPad mount on the bike, but since the Peloton app supports AirPlay, I decided I would just stream classes from my iPhone to the Apple TV in our living room.
What it Cost
Just a few hours later, I was checking out with everything I needed on Amazon. Here’s what I ended up buying and how much it cost:
- Sunny B1509 Belt Drive Bike ($351.14) - currently unavailable, so I’d recommend the B1002 and a new set of pedals with clips
- Peloton app + subscription ($12.99/mo)
- Wahoo Cadence Sensor ($39.99)
- Sbode iPhone Mount ($11.99)
- Old iPhone ($0, already owned) - to show cadence from the Wahoo sensor
- Apple TV ($0, already owned) - to AirPlay classes from the app to my TV
Total Cost: $403.12 = $2,011.46 saved = 83% discount
Not only did I ended up saving >$2,000 on the bike, but since Peloton’s monthly subscription is $26/month more when you have their bike, I’ll end up saving an additional $312/year.
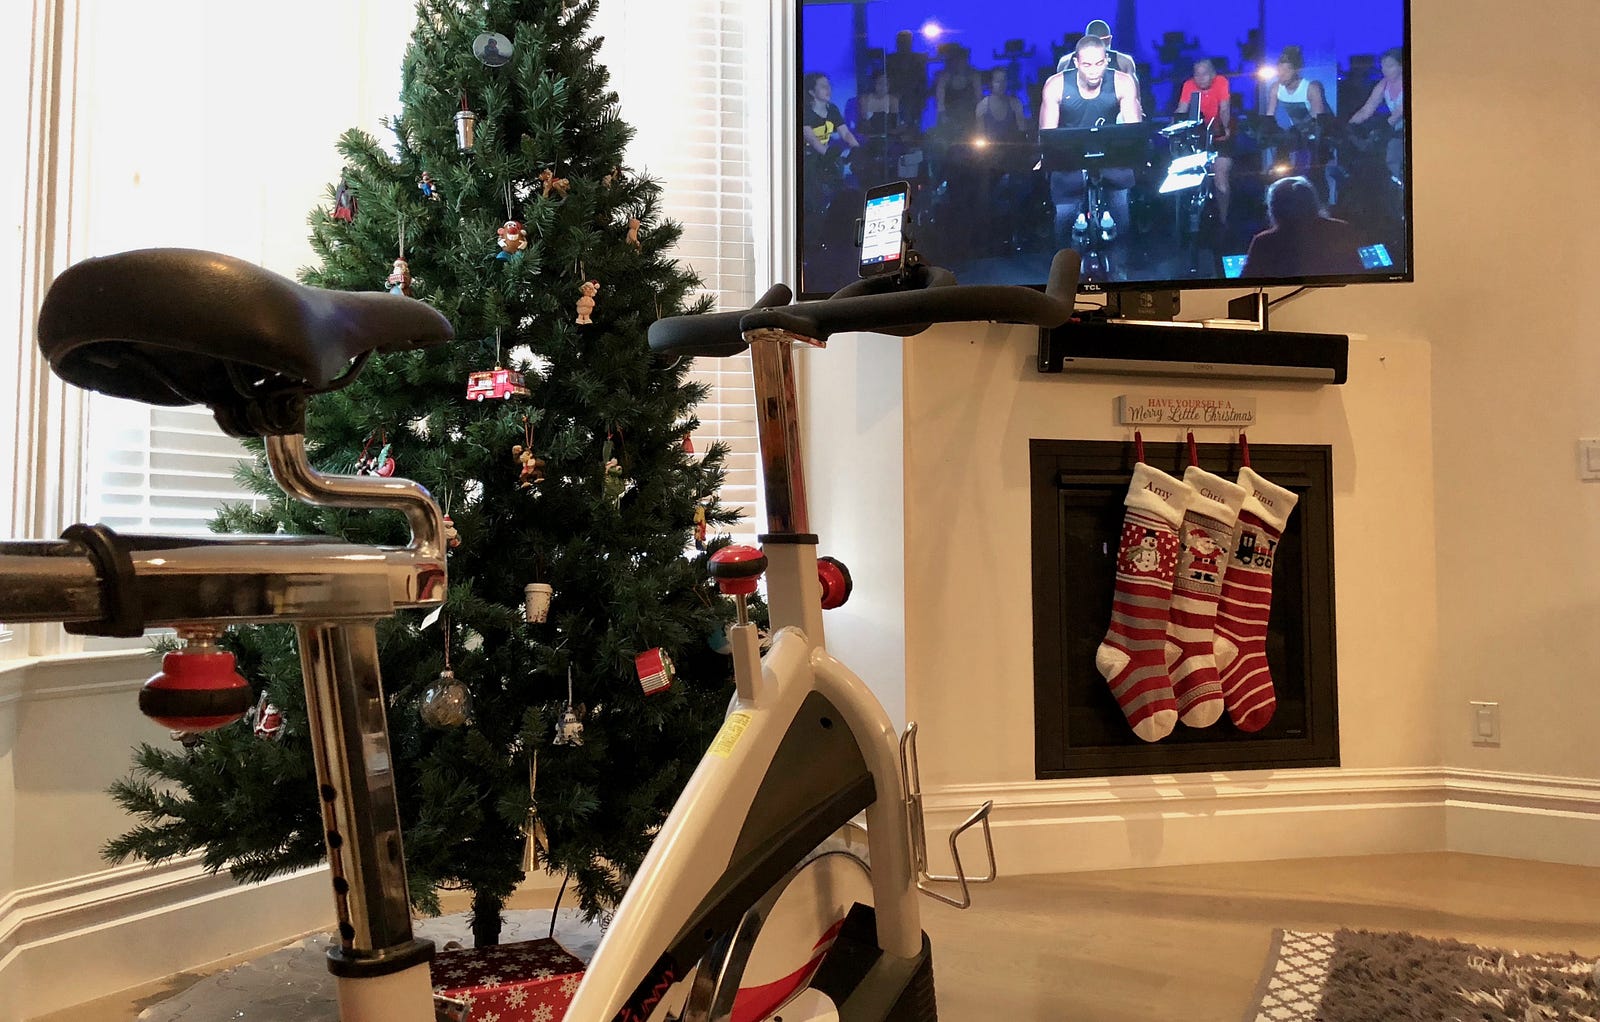
My Sunny B1509
Do I wish I had the real thing?
The DIY experience isn’t perfect and certainly has its shortcomings (see below). That said, I don’t think any of what I’m missing is worth the extra $2k + $26/mo. Here’s where the DIY approach falls short:
- Setup for each class: Before every class I need to open the Wahoo fitness app on my old iPhone (which needs to be charged), then open the Peloton app on my current iPhone and stream it to my AppleTV.
- Ride tracking/sharing: A Peloton bike tracks all your ride metrics and allows you to see how you’ve improved over time and compete with other friends on the platform. Since the Peloton app doesn’t have any integration with my bike or cadence sensor, the only metrics I track are from logging the workout on my Apple Watch.
- Precise resistance: In Peloton classes, the instructors tell you what cadence and resistance to ride at. The Peloton bike displays your real-time resistance level, so it’s easy to set to the precise level, but since there isn’t a 3rd-party resistance sensor, my DIY setup means you have to get a feel for the right level. After my first 2–3 rides, I found this super easy to do.
- Motivation/leaderboard: For classes on the Peloton bike, you can compete in real-time with everyone who has taken the ride and in live classes, the instructors often give shoutouts to riders at home. No workaround here, but not a big deal to me